Skip to content
Facebook-f
Pinterest
Instagram
Youtube
My Account
Downloads
My Account
Downloads
$
0.00
0
Cart
Home
Creatables
Freebies
Design Elements
Embellishments
Borders / Frames
Word Art / Titles
Sketchables
Digital Paper (Singles)
Digital Stamps
Theme Sets
Embellishment Sets
Border / Frame Sets
Sketchable Sets
Digital Paper Packs
Alphabet & Number Sets
Word / Title Sets
Digital Stamp Sets
SVG Scrap Kits
Doables / 3D
3D
Boxes – Bags
Cards – Envelopes
Earrings
Gift Holders
Ready to Make
Treat Holders
Laserables – Laser Cut Files
Virtual Wallet
Commercial Licenses
Freebies
Free SVG Files
Free Scrapbook Templates
Kids Creatables
Help
FAQ
Terms of Use
Privacy Policy
License & Copyright
Contact Me
Blog
Meet Our Design Team!
How to Tutorials
Software Tutorials
Cricut Design Space Tutorials
Silhouette Studio Tutorials
How To by Material
Project Ideas
Craft Theme
Craft Type
News & Events
Design SVG Files
Home
Creatables
Freebies
Design Elements
Embellishments
Borders / Frames
Word Art / Titles
Sketchables
Digital Paper (Singles)
Digital Stamps
Theme Sets
Embellishment Sets
Border / Frame Sets
Digital Paper Packs
Sketchable Sets
Alphabet & Number Sets
Word / Title Sets
Digital Stamp Sets
SVG Scrap Kits
Doables / 3D
3D
Boxes – Bags
Cards – Envelopes
Earrings
Gift Holders
Ready to Make
Treat Holders
Laserables – Laser Cut Files
Virtual Wallet
Freebies
Free SVG Files
Free Scrapbook Templates
Kids Creatables
Licenses
Commercial Licenses
License & Copyright
Help
FAQ
License & Copyright-2015-2021
Terms of Use
Privacy Policy
Contact Me
Blog
Meet Our Design Team!
How to Tutorials
Software Tutorials
Cricut Design Space Tutorials
Silhouette Studio Tutorials
Tutorials by Material
Project Ideas
Craft Theme
Craft Type
News & Events
My Account
Downloads
My Wish List
Design SVG Files
$
0.00
0
Cart
Join the NEW PCC Rewards to earn points on every order!
Join now!
Software Tutorials
Cricut Design Space Tutorials
Silhouette Studio Tutorials
Tutorials by Material
HTV
Paper
Print then Cut
Vinyl
Craft Theme
Baby
Birthday
Christmas
Easter
Fall
Graduation
Halloween
School
Spring
St. Patrick’s Day
Summer
Thanksgiving
Valentine
Wedding
Winter
Craft Type
Apparel & Accessories
Card Making
Home Decor
Laser
Party Decor
Scrapbooking
Sublimation
News & Events
Search
Project Ideas
How to
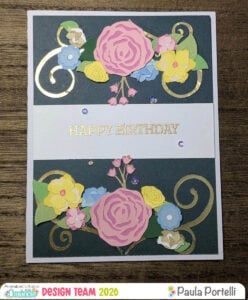
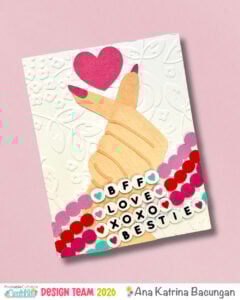
Floral Birthday Card Inspo
How to
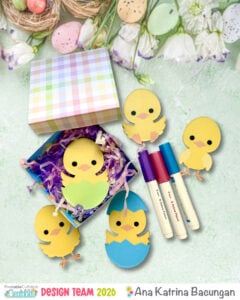
DIY Easter Magnet Craft Kit
How to
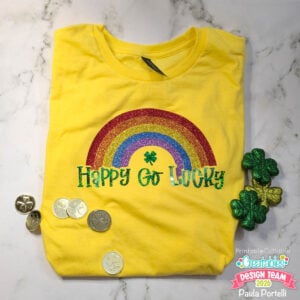
DIY St. Patrick’s Day Shirt
How to
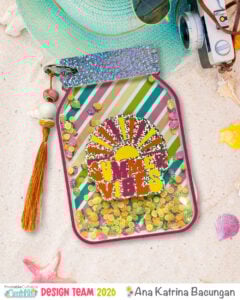
DIY Shaker Jar Mini Album
How to
DIY Cute Crab Birthday Card
How to
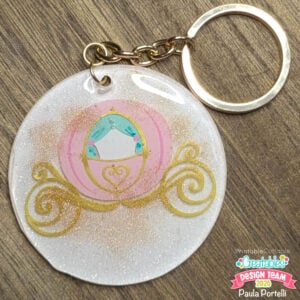
DIY Glitter Keychain Tutorial
How to
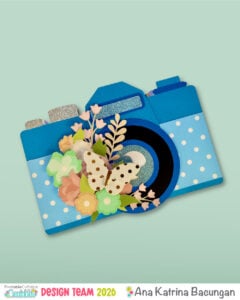
Vintage Camera Mini Album
How to
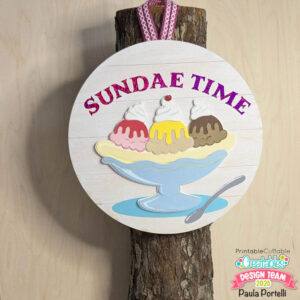
Ice Cream Sundae Sign Tutorial
How to
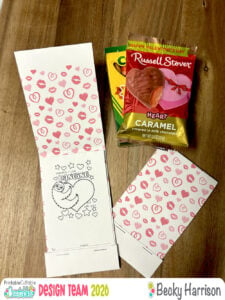
DIY Valentine Matchbook Card
How to
Galentine’s Day Gift Tutorial
How to
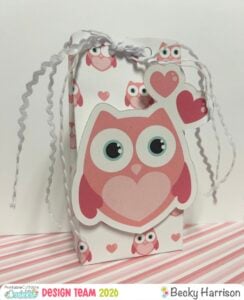
Valentine Treat Box Inspo
How to
DIY Basketball Birthday Card
« Previous
Page
1
Page
2
Page
3
Page
4
…
Page
38
Next »
Shop & Save!
Shop & Save!
Create an Account
First Name
Email
Username
Password
Confirm Password
Acceptance
By creating an account, I agree to the Printable Cuttable Creatables
Terms of Use
,
Privacy Policy
, Financial Incentive Statement, and participation in the PCC Rewards program. I understand that freebie-only accounts are subject to deletion. I understand that I can change my loyalty reward preferences at any time.
Create Account
Sign in
Email
Password
Remember me
Remember me
Log In
This site uses cookies to provide functionality and give you the best experience. You can learn more in our
Privacy Policy.
. By continuing to use this site, you agree to our use of cookies.
Accept & Continue